 UpMatched
 Mordekaiser vs Kennen Matchup Guide
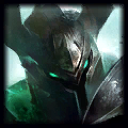
Mordekaiser
Top Lane Juggernaut
The Iron Revenant — melee juggernaut built around banishing one target into Realm of Death and stacking Darkness Rise burns while Indestructible absorbs the damage trading back
Kennen
Top Lane Skirmisher
The Heart of the Tempest — ranged skirmisher who stacks Mark of the Storm into a chain stun, pokes from range with Thundering Shuriken, and zones teamfights with the storm of Slicing Maelstrom
Champ Select Cheat Sheet — Mordekaiser vs Kennen
 ConquerorConquerorGain stacks of adaptive force when attacking enemy champions. After reaching 12 stacks, heal for a portion of damage you deal to champions. stays the keystone, with
  Absorb LifeAbsorb LifeKilling a target heals you. swapped in for the usual
  TriumphTriumphTakedowns restore 5% of your missing health and grant an additional 20 gold., then
  Legend: HasteLegend: HasteTakedowns on enemies grant permanent Basic Ability Haste. and
  Last StandLast StandDeal more damage to champions while you are low on health. to close Precision
 Second WindSecond WindAfter taking damage from an enemy champion heal back some missing health over time. and
  RevitalizeRevitalizeGain 5% Heal and Shield Power.Heals and shields you cast or receive are 10% stronger on targets below 40% health. replace the Inspiration package entirely - the guide calls Second WindSecond WindAfter taking damage from an enemy champion heal back some missing health over time. the best lane sustain and RevitalizeRevitalizeGain 5% Heal and Shield Power.Heals and shields you cast or receive are 10% stronger on targets below 40% health. the default W amp
 FlashFlashTeleports you a short distance toward your cursor. +
  TeleportTeleportAfter a brief channel, become untargetable and travel to an allied unit. Upgrades into Unleashed Teleport, which significantly increases travel speed.
Matchup Dynamics
How This Matchup Works
Federals1 tags this matchup Skill on the sheet, and the row plays out like a survival plan rather than an aggressive one: Absorb LifeAbsorb LifeKilling a target heals you. over the usual TriumphTriumphTakedowns restore 5% of your missing health and grant an additional 20 gold., Second WindSecond WindAfter taking damage from an enemy champion heal back some missing health over time. and RevitalizeRevitalizeGain 5% Heal and Shield Power.Heals and shields you cast or receive are 10% stronger on targets below 40% health. from Resolve instead of the Inspiration package, and a build that skips every damage staple - Rylai's, Liandry's,  RiftmakerRiftmaker70 Ability Power350 Health15 Ability HasteVoid CorruptionFor each second in combat with enemy champions, deal 2% bonus damage, up to 8%. - for
  Doran's ShieldDoran's ShieldGood defensive starting item into
  Mercury's TreadsMercury's TreadsIncreases Move Speed and reduces duration of disabling effects,
  Spirit VisageSpirit VisageIncreases Health and healing effects, and
  Cosmic DriveCosmic DriveMassive amounts of Cooldown Reduction. Kennen stacks
  Mark of the StormP – Mark of the StormKennen stuns enemies he hits 3 times with his abilities. from range before Mordekaiser can close, so the early lane is about eating chip damage and denying the stun window until items land. Mercury's TreadsMercury's TreadsIncreases Move Speed and reduces duration of disabling effects answers a kit that carries two separate stun sources, and Spirit VisageSpirit VisageIncreases Health and healing effects with Cosmic DriveCosmic DriveMassive amounts of Cooldown Reduction turn the lane around once they finish.
Early Game (1-5)
Kennen Favored -  Thundering ShurikenQ – Thundering ShurikenKennen throws a fast moving shuriken towards a location, causing damage and adding a Mark of the Storm to any opponent that it hits. and
  Electrical SurgeW – Electrical SurgeKennen passively deals extra damage and adds a Mark of the Storm to his target every few attacks, and he can activate this ability to damage and add another Mark of the Storm to targets who are alread... stack Mark of the StormP – Mark of the StormKennen stuns enemies he hits 3 times with his abilities. from a range Mordekaiser cannot easily close, and three stacks is a stun into a full combo; the lane is about minimizing chip damage until items land, not fighting for it.
Mid Game (6-11)
Mordekaiser Favored - Spirit Visage's sustain and Cosmic Drive's haste land alongside the guide's marked strongest stretch of the game; Mercury's TreadsMercury's TreadsIncreases Move Speed and reduces duration of disabling effects is already breaking the stun chain by this point.
Late Game (12+)
Skill Matchup -  Slicing MaelstromR – Slicing MaelstromKennen summons a storm that strikes at nearby enemy champions for magical damage. zones a teamfight the same way
  Realm of DeathR – Realm of DeathMordekaiser drags his victim to a different dimension with him and steals a portion of their stats. If he kills them, he keeps the stats until the victim respawns. isolates one target; both kits carry a real answer to the other's strongest tool this late.
Key Interactions
- Mark of the StormP – Mark of the StormKennen stuns enemies he hits 3 times with his abilities. forces a range problem, not a dash problem: Kennen never has to dodge a cast; staying outside Obliterate's reach denies the isolated proc just as well, so the lane opens as a poke race Mordekaiser is not built to win yet.
- Absorb LifeAbsorb LifeKilling a target heals you. and Second WindSecond WindAfter taking damage from an enemy champion heal back some missing health over time. replace the usual aggression page: The guide swaps TriumphTriumphTakedowns restore 5% of your missing health and grant an additional 20 gold. for optional sustain and runs Second WindSecond WindAfter taking damage from an enemy champion heal back some missing health over time. plus RevitalizeRevitalizeGain 5% Heal and Shield Power.Heals and shields you cast or receive are 10% stronger on targets below 40% health. from Resolve instead of Inspiration - this row is built to survive the early poke, not punish it.
- Mercury's TreadsMercury's TreadsIncreases Move Speed and reduces duration of disabling effects answers a kit with two stun sources: Between the stacking passive and Slicing Maelstrom's repeated marks, tenacity is worth more here than in most matchups; the guide calls Mercs the only real source of it besides an elixir.
- Realm of DeathR – Realm of DeathMordekaiser drags his victim to a different dimension with him and steals a portion of their stats. If he kills them, he keeps the stats until the victim respawns. outruns the zone he sets: Slicing MaelstromR – Slicing MaelstromKennen summons a storm that strikes at nearby enemy champions for magical damage. controls an area, but it cannot follow a target already banished into Realm of DeathR – Realm of DeathMordekaiser drags his victim to a different dimension with him and steals a portion of their stats. If he kills them, he keeps the stats until the victim respawns.; catch him without the zone up and the isolation runs clean.
Mordekaiser
Strengths
- Realm of DeathR – Realm of DeathMordekaiser drags his victim to a different dimension with him and steals a portion of their stats. If he kills them, he keeps the stats until the victim respawns. isolates him completely once it locks in, and Slicing MaelstromR – Slicing MaelstromKennen summons a storm that strikes at nearby enemy champions for magical damage. has no way to reach inside the banishment
- Indestructible's banked shield covers chip damage taken while surviving the early poke window
- Mercury's TreadsMercury's TreadsIncreases Move Speed and reduces duration of disabling effects cuts directly into a kit that stuns twice over, from the stacking passive and from the ultimate's zone
Weaknesses
- No ranged tool of his own, so Thundering ShurikenQ – Thundering ShurikenKennen throws a fast moving shuriken towards a location, causing damage and adding a Mark of the Storm to any opponent that it hits. and Electrical SurgeW – Electrical SurgeKennen passively deals extra damage and adds a Mark of the Storm to his target every few attacks, and he can activate this ability to damage and add another Mark of the Storm to targets who are alread... stack marks for free before he closes the distance
- A completed third stack is a stun into a full combo, with no way to interrupt the
 markMarkThrow a snowball in a straight line at your enemies. If it hits an enemy, they become marked, granting True Sight, and your champion can quickly travel to the marked target as a follow up. from range
 - The build skips every damage item in the guide's standard core, trading a slower mid-game spike for lane survival
Kennen
Strengths
- Thundering ShurikenQ – Thundering ShurikenKennen throws a fast moving shuriken towards a location, causing damage and adding a Mark of the Storm to any opponent that it hits. pokes from a range
 ObliterateQ – ObliterateMordekaiser smashes the ground with his mace dealing damage to each enemy struck. Damage is increased when hitting a single enemy. cannot answer, denying the isolated proc without ever entering melee
 - MarkMarkThrow a snowball in a straight line at your enemies. If it hits an enemy, they become marked, granting True Sight, and your champion can quickly travel to the marked target as a follow up. of the Storm's third stack stuns on its own, turning any careless walk-up into a free combo
- Slicing MaelstromR – Slicing MaelstromKennen summons a storm that strikes at nearby enemy champions for magical damage. zones a teamfight area the same way Realm of DeathR – Realm of DeathMordekaiser drags his victim to a different dimension with him and steals a portion of their stats. If he kills them, he keeps the stats until the victim respawns. isolates a single target, giving him a real answer to it
Weaknesses
- The zone-control kit has no way to intervene once Realm of DeathR – Realm of DeathMordekaiser drags his victim to a different dimension with him and steals a portion of their stats. If he kills them, he keeps the stats until the victim respawns. has already locked a target away
- Mercury's TreadsMercury's TreadsIncreases Move Speed and reduces duration of disabling effects cuts the stun-chain plan down significantly once it lands in the build
- Falls off in a straight sustained fight once Spirit VisageSpirit VisageIncreases Health and healing effects and
 IndestructibleW – IndestructibleMordekaiser stores damage he deals and takes to create a shield. He may consume the shield to heal. are both online and the poke stops adding up
Power Curve Comparison EXPERIMENTAL
Power Curve Visualization
Win Conditions
Mordekaiser's Win Condition
- Minimize chip damage early rather than trading for it; the sustain-heavy rune page is built to survive the poke, not answer it in kind
- Rush Mercury's TreadsMercury's TreadsIncreases Move Speed and reduces duration of disabling effects before the stun chain gets out of hand; tenacity cuts into both the passive stacks and the ultimate's zone
- Hold IndestructibleW – IndestructibleMordekaiser stores damage he deals and takes to create a shield. He may consume the shield to heal. up before closing distance; a shieldless walk-up into stacked marks is a free stun combo
- Isolate him with Realm of DeathR – Realm of DeathMordekaiser drags his victim to a different dimension with him and steals a portion of their stats. If he kills them, he keeps the stats until the victim respawns. whenever he is caught without Slicing MaelstromR – Slicing MaelstromKennen summons a storm that strikes at nearby enemy champions for magical damage. up; the zone cannot reach inside the banishment
Kennen's Win Condition
- Stacks Mark of the StormP – Mark of the StormKennen stuns enemies he hits 3 times with his abilities. with Thundering ShurikenQ – Thundering ShurikenKennen throws a fast moving shuriken towards a location, causing damage and adding a Mark of the Storm to any opponent that it hits. and Electrical SurgeW – Electrical SurgeKennen passively deals extra damage and adds a Mark of the Storm to his target every few attacks, and he can activate this ability to damage and add another Mark of the Storm to targets who are alread... from range before Mordekaiser can close the distance
- Punishes the third stack immediately with a full combo rather than letting the stun go to waste
- Holds Slicing MaelstromR – Slicing MaelstromKennen summons a storm that strikes at nearby enemy champions for magical damage. for a teamfight zone rather than a lane skirmish, where it does more work
- Uses
 Lightning RushE – Lightning RushKennen morphs into a lightning form, enabling him to pass through units and apply a Mark of the Storm. Kennen gains Move Speed when entering this form, and attack speed when leaving it. to reset spacing after a poke exchange instead of committing to an extended trade
Laning Phase Guide
| Level/Phase | Mordekaiser | Kennen |
|---|---|---|
| Level 1 | Doran's ShieldDoran's ShieldGood defensive starting item into a potion; ranged poke has no answer at level 1, so the goal is capping how much chip damage lands rather than trading for it. |
Opens with Thundering ShurikenQ – Thundering ShurikenKennen throws a fast moving shuriken towards a location, causing damage and adding a Mark of the Storm to any opponent that it hits. poke on minions and champion alike, starting the markMarkThrow a snowball in a straight line at your enemies. If it hits an enemy, they become marked, granting True Sight, and your champion can quickly travel to the marked target as a follow up. stack from a safe range. |
| Level 2 | Second point to W or E depending on how much poke is landing; a fished pull rarely reaches a target who never has to enter melee. | Adds Electrical SurgeW – Electrical SurgeKennen passively deals extra damage and adds a Mark of the Storm to his target every few attacks, and he can activate this ability to damage and add another Mark of the Storm to targets who are alread..., letting marks stack in melee too if he chooses to walk up rather than only poke. |
| Level 3 | Full basic kit, but the priority is surviving to items; a completed third stack is a stun into real damage, so track marks closely. | Full kit including Lightning RushE – Lightning RushKennen morphs into a lightning form, enabling him to pass through units and apply a Mark of the Storm. Kennen gains Move Speed when entering this form, and attack speed when leaving it.; the mobile form resets spacing after every poke exchange. |
| Level 4-5 | Hold the wave and push for Mercury's TreadsMercury's TreadsIncreases Move Speed and reduces duration of disabling effects; the  bootsBootsSlightly increases Move Speed alone start cutting into the stun-chain plan. bootsBootsSlightly increases Move Speed alone start cutting into the stun-chain plan. |
Presses the poke advantage while it lasts; a fished spell from him is still a real punish window before bootsBootsSlightly increases Move Speed are up. |
| Level 6 | Realm of DeathR – Realm of DeathMordekaiser drags his victim to a different dimension with him and steals a portion of their stats. If he kills them, he keeps the stats until the victim respawns. changes what a mistake costs him; catch him without Slicing MaelstromR – Slicing MaelstromKennen summons a storm that strikes at nearby enemy champions for magical damage. ready and the isolation runs clean. |
Slicing MaelstromR – Slicing MaelstromKennen summons a storm that strikes at nearby enemy champions for magical damage. is a teamfight tool first; a lane duel that is already locked inside Realm of DeathR – Realm of DeathMordekaiser drags his victim to a different dimension with him and steals a portion of their stats. If he kills them, he keeps the stats until the victim respawns. is simply out of its reach. |
| Level 7-8 | Spirit VisageSpirit VisageIncreases Health and healing effects and Cosmic DriveCosmic DriveMassive amounts of Cooldown Reduction should be landing; the trade shape shifts from surviving poke to a real skirmish threat. |
The sustain items start blunting the poke plan; has to look for the stun window rather than chip damage alone. |
| Level 9 | Q maxed; with Spirit VisageSpirit VisageIncreases Health and healing effects and Cosmic DriveCosmic DriveMassive amounts of Cooldown Reduction finished, damage output finally catches up to what the poke was costing earlier. |
Falls back on MarkMarkThrow a snowball in a straight line at your enemies. If it hits an enemy, they become marked, granting True Sight, and your champion can quickly travel to the marked target as a follow up. of the Storm's stun threat and Slicing Maelstrom's teamfight value as the poke plan stops working. |
Power Spikes
Level Spikes
| Mordekaiser | Kennen | ||
|---|---|---|---|
| Level | Description | Level | Description |
| 3 | Minor Full basic kit online, though the priority is surviving to items rather than trading here | 3 | Minor Full kit online; Lightning RushE – Lightning RushKennen morphs into a lightning form, enabling him to pass through units and apply a Mark of the Storm. Kennen gains Move Speed when entering this form, and attack speed when leaving it. adds mobility to the poke-and-stack pattern |
| 6 | Major Realm of DeathR – Realm of DeathMordekaiser drags his victim to a different dimension with him and steals a portion of their stats. If he kills them, he keeps the stats until the victim respawns. removes him from Slicing Maelstrom's zone entirely once the banishment locks in |
6 | Major The storm covers a wide teamfight area, but nothing about it follows a target once he vanishes into Realm of DeathR – Realm of DeathMordekaiser drags his victim to a different dimension with him and steals a portion of their stats. If he kills them, he keeps the stats until the victim respawns. |
| 9 | Major Spirit VisageSpirit VisageIncreases Health and healing effects and Cosmic DriveCosmic DriveMassive amounts of Cooldown Reduction complete the sustain plan, tipping the lane's damage math back in his favor |
11 | Major Full markMarkThrow a snowball in a straight line at your enemies. If it hits an enemy, they become marked, granting True Sight, and your champion can quickly travel to the marked target as a follow up.-stacking pressure stays relevant even once the poke plan alone stops deciding trades |
Item Spikes
| Mordekaiser | Kennen | ||
|---|---|---|---|
| Item | Description | Item | Description |
| Doran's ShieldDoran's ShieldGood defensive starting item |
Defensive start built for absorbing poke rather than winning early trades |  Hextech RocketbeltHextech RocketbeltActivate to dash forward and unleash a fiery explosion Hextech RocketbeltHextech RocketbeltActivate to dash forward and unleash a fiery explosion |
Dash-and-poke tool that closes distance for a stun setup or opens an escape |
| Mercury's TreadsMercury's TreadsIncreases Move Speed and reduces duration of disabling effects |
The guide's only real tenacity source outside an elixir; cuts directly into the stun-chain plan | RiftmakerRiftmaker70 Ability Power350 Health15 Ability HasteVoid CorruptionFor each second in combat with enemy champions, deal 2% bonus damage, up to 8%. |
Sustained magic damage for the fights that run past the initial poke exchange |
| Spirit VisageSpirit VisageIncreases Health and healing effects |
Increases both the IndestructibleW – IndestructibleMordekaiser stores damage he deals and takes to create a shield. He may consume the shield to heal. shield and the reactivate  healHealRestores Health and grants Move Speed to you and target allied champion.; the guide's default MR item healHealRestores Health and grants Move Speed to you and target allied champion.; the guide's default MR item |
 Zhonya's HourglassZhonya's HourglassActivate to become invincible but unable to take actions Zhonya's HourglassZhonya's HourglassActivate to become invincible but unable to take actions |
Buys out a bad engage or a landed Realm of DeathR – Realm of DeathMordekaiser drags his victim to a different dimension with him and steals a portion of their stats. If he kills them, he keeps the stats until the victim respawns. cast |
| Cosmic DriveCosmic DriveMassive amounts of Cooldown Reduction |
Move speed plus underrated ability haste; can be rushed ahead of schedule per the guide | ||
| Jak'Sho | The guide's heavy-AP alternate build continuation once the row's four items are finished | ||
Best Build for Mordekaiser
Starting Items
Core Items
Doran's ShieldDoran's ShieldGood defensive starting item opens for the poke; Mercury's TreadsMercury's TreadsIncreases Move Speed and reduces duration of disabling effects answers the stun chain next, then Spirit VisageSpirit VisageIncreases Health and healing effects for sustain and Cosmic DriveCosmic DriveMassive amounts of Cooldown Reduction for haste finish the row
Runes
Primary: ConquerorConquerorGain stacks of adaptive force when attacking enemy champions. After reaching 12 stacks, heal for a portion of damage you deal to champions. stays the keystone, with Absorb LifeAbsorb LifeKilling a target heals you. swapped in for the usual TriumphTriumphTakedowns restore 5% of your missing health and grant an additional 20 gold., then Legend: HasteLegend: HasteTakedowns on enemies grant permanent Basic Ability Haste. and Last StandLast StandDeal more damage to champions while you are low on health. to close Precision
Secondary: Resolve's Second WindSecond WindAfter taking damage from an enemy champion heal back some missing health over time. and RevitalizeRevitalizeGain 5% Heal and Shield Power.Heals and shields you cast or receive are 10% stronger on targets below 40% health. replace the Inspiration package entirely - the guide calls Second WindSecond WindAfter taking damage from an enemy champion heal back some missing health over time. the best lane sustain and RevitalizeRevitalizeGain 5% Heal and Shield Power.Heals and shields you cast or receive are 10% stronger on targets below 40% health. the default W amp
Summoner Spells
FlashFlashTeleports you a short distance toward your cursor. + TeleportTeleportAfter a brief channel, become untargetable and travel to an allied unit. Upgrades into Unleashed Teleport, which significantly increases travel speed.
Priority Build Path
Mercury's Treads
First real item; tenacity cuts into the stun-chain plan immediately
Spirit Visage
Sustain amp for both the W shield and its reactivate healHealRestores Health and grants Move Speed to you and target allied champion.
Cosmic Drive
Haste and move speed; the guide notes it can be rushed
 Jak'Sho
Continuation into the guide's heavy-AP build once the row's items are done
Situational Adjustments
 Death's DanceDeath's Dance60 Attack Damage50 Armor15 Ability HasteIgnore PainA percentage of damage taken is dealt to you over 3 seconds instead.DefyWhen a champion that you damaged within 3 seconds dies, cleanse Ignore Pain's...: the stun-into-burst combo is landing consistently and surviving the window matters more than sustained damage
- Zhonya's HourglassZhonya's HourglassActivate to become invincible but unable to take actions: dodging the stun-chain engage window outright is worth more than another point of sustain
Key Patterns
Lethal Combos
 E > W > Q > R
IndestructibleW – IndestructibleMordekaiser stores damage he deals and takes to create a shield. He may consume the shield to heal., land the isolated ObliterateQ – ObliterateMordekaiser smashes the ground with his mace dealing damage to each enemy struck. Damage is increased when hitting a single enemy., then Realm of DeathR – Realm of DeathMordekaiser drags his victim to a different dimension with him and steals a portion of their stats. If he kills them, he keeps the stats until the victim respawns. removes him from Slicing Maelstrom's zone for good.
Q > Q > W > E
Electrical SurgeW – Electrical SurgeKennen passively deals extra damage and adds a Mark of the Storm to his target every few attacks, and he can activate this ability to damage and add another Mark of the Storm to targets who are alread... pulse complete the third markMarkThrow a snowball in a straight line at your enemies. If it hits an enemy, they become marked, granting True Sight, and your champion can quickly travel to the marked target as a follow up. stack for the stun; Lightning RushE – Lightning RushKennen morphs into a lightning form, enabling him to pass through units and apply a Mark of the Storm. Kennen gains Move Speed when entering this form, and attack speed when leaving it. closes the gap to finish it in melee.
Trading Combos
Q > AA > W
IndestructibleW – IndestructibleMordekaiser stores damage he deals and takes to create a shield. He may consume the shield to heal. confirmed up.
Q > AA
Thundering ShurikenQ – Thundering ShurikenKennen throws a fast moving shuriken towards a location, causing damage and adding a Mark of the Storm to any opponent that it hits. and backs off; rarely stays for a second auto until the third markMarkThrow a snowball in a straight line at your enemies. If it hits an enemy, they become marked, granting True Sight, and your champion can quickly travel to the marked target as a follow up. stack is ready to punish a walk-up.
Lethal Thresholds
- Mordekaiser Kill Range: No clean percent-HP trigger while marks are still stacking; the real threshold is the stack count itself - anything under three is safe to walk into, three is not.
- Kennen Kill Range: Looks for the kill the moment a third stack lands on a target with no escape; past that window, the stun goes to waste.
- Critical Levels: 3 (full kit, priority is surviving to items) / 6 (Realm of DeathR – Realm of DeathMordekaiser drags his victim to a different dimension with him and steals a portion of their stats. If he kills them, he keeps the stats until the victim respawns. answers Slicing MaelstromR – Slicing MaelstromKennen summons a storm that strikes at nearby enemy champions for magical damage.) / 9-11 (Spirit VisageSpirit VisageIncreases Health and healing effects and Cosmic DriveCosmic DriveMassive amounts of Cooldown Reduction complete the sustain plan)
Level by Level Game Plan
| Level | Primary Goal | Lane Position | Trading Opportunities | Kill Windows | Setup Opportunities |
|---|---|---|---|---|---|
| 1 | Minimize chip damage, not trade for it | Hold the wave edge, outside easy poke | None yet; there is nothing to answer with at range | Low | Track markMarkThrow a snowball in a straight line at your enemies. If it hits an enemy, they become marked, granting True Sight, and your champion can quickly travel to the marked target as a follow up. stacks from the very first poke |
| 2 | Hold the level without overextending | Push only when marks are not stacked | Autos only if he walks up carelessly | Low | Watch for Electrical SurgeW – Electrical SurgeKennen passively deals extra damage and adds a Mark of the Storm to his target every few attacks, and he can activate this ability to damage and add another Mark of the Storm to targets who are alread... added at level 2 |
| 3 | Full kit, priority is survival | Bait a trade, respect the third stack | Q > AA > W once a real opening appears | Medium | Never walk in already sitting on two marks |
| 4-5 | Push toward Mercury's TreadsMercury's TreadsIncreases Move Speed and reduces duration of disabling effects |
Hold the wave, avoid extended pokes | Short and controlled, nothing extended | Low | Track summoner spell cooldowns on both sides before pushing |
| 6 | Realm of DeathR – Realm of DeathMordekaiser drags his victim to a different dimension with him and steals a portion of their stats. If he kills them, he keeps the stats until the victim respawns. answers the zone |
Look for the moment Slicing MaelstromR – Slicing MaelstromKennen summons a storm that strikes at nearby enemy champions for magical damage. is down |
R into the full combo once isolated | High if caught without FlashFlashTeleports you a short distance toward your cursor. |
Confirm his ultimate is on cooldown before committing |
| 7-8 | Sustain items cut the poke down | Shift from surviving to a real skirmish threat | Full combo on cooldown | Medium | Tenacity is already softening the stun chain |
| 9+ | Mid-game spike opens | Push to threaten side-lane pressure | Every cooldown up is a trade window | High | The sustain items have already paid for themselves by this point |
| Mid Game (11-16) | Play the side-lane threat | Group when his zone control matters, split otherwise | Catch him without Slicing MaelstromR – Slicing MaelstromKennen summons a storm that strikes at nearby enemy champions for magical damage. ready before committing |
High off a clean isolation | Track his ultimate cooldown before engaging |
| Late Game (16+) | Respect the guide's late-game window | Frontline, banked IndestructibleW – IndestructibleMordekaiser stores damage he deals and takes to create a shield. He may consume the shield to heal. shield ready |
No engage without the ultimate ready | Whenever no shield break has touched him | Slicing MaelstromR – Slicing MaelstromKennen summons a storm that strikes at nearby enemy champions for magical damage. still zones a fight even from a losing position |
First Back Goals
Teamfight Tips
| Aspect | Mordekaiser | Kennen |
|---|---|---|
| Primary Role | Diving duelist looking to erase the priority threat with Realm of DeathR – Realm of DeathMordekaiser drags his victim to a different dimension with him and steals a portion of their stats. If he kills them, he keeps the stats until the victim respawns. while IndestructibleW – IndestructibleMordekaiser stores damage he deals and takes to create a shield. He may consume the shield to heal. soaks whatever the rest of the fight throws at him |
Ranged zone-control mage who anchors fights from range with Slicing MaelstromR – Slicing MaelstromKennen summons a storm that strikes at nearby enemy champions for magical damage. rather than diving into the frontline himself |
| Target Priority | Whoever the ultimate can pull cleanest out of the fight, usually a squishy backline threat Kennen himself once Slicing MaelstromR – Slicing MaelstromKennen summons a storm that strikes at nearby enemy champions for magical damage. is spentThe frontline target already committed |
Grouped targets standing inside the Slicing MaelstromR – Slicing MaelstromKennen summons a storm that strikes at nearby enemy champions for magical damage. zone Whoever his team's engage opens up first Mordekaiser only once his own ultimate is down |
| Objective Control | Turns a contested objective fight into a numbers advantage the moment Realm of DeathR – Realm of DeathMordekaiser drags his victim to a different dimension with him and steals a portion of their stats. If he kills them, he keeps the stats until the victim respawns. removes their frontliner Hold the shield banked for the moment a dive starts |
Zones the pit entrance with Slicing MaelstromR – Slicing MaelstromKennen summons a storm that strikes at nearby enemy champions for magical damage. rather than fighting for it directly Waits at range for a stray target before engaging |
| Positioning | Waits for him to spend Slicing MaelstromR – Slicing MaelstromKennen summons a storm that strikes at nearby enemy champions for magical damage. before committing the ultimate Banks Indestructible's shield first, engages second |
Stays at the edge of the fight, marking whoever wanders into range Saves Lightning RushE – Lightning RushKennen morphs into a lightning form, enabling him to pass through units and apply a Mark of the Storm. Kennen gains Move Speed when entering this form, and attack speed when leaving it. to reposition rather than engage directly |
| Other Tips | Realm of DeathR – Realm of DeathMordekaiser drags his victim to a different dimension with him and steals a portion of their stats. If he kills them, he keeps the stats until the victim respawns. removes a target from Slicing Maelstrom's zone entirely, which is worth more than trading damage with the storm directly Indestructible's reactivate healHealRestores Health and grants Move Speed to you and target allied champion. is often better saved for topping up between engages than spent mid-fight |
Slicing MaelstromR – Slicing MaelstromKennen summons a storm that strikes at nearby enemy champions for magical damage. rewards standing still and zoning over chasing a single killLightning RushE – Lightning RushKennen morphs into a lightning form, enabling him to pass through units and apply a Mark of the Storm. Kennen gains Move Speed when entering this form, and attack speed when leaving it. is worth more as an escape after zoning a fight than as an opening engage |