 UpMatched
 Mordekaiser vs Renekton Matchup Guide
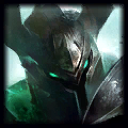
Mordekaiser
Top Lane Juggernaut
Melee AP juggernaut whose isolated Obliterate poke, banked Indestructible shield, and isolating Realm of Death punish anyone who trades into him without a plan
Renekton
Top Lane Fighter
Fury-fueled bruiser whose empowered stun, self-healing Cull the Meek, and Slice and Dice dash front-load a burst threat that fades as the game runs long
Champ Select Cheat Sheet — Mordekaiser vs Renekton
 Bone PlatingBone PlatingAfter taking damage from an enemy champion, the next 3 spells or attacks you receive from them deal 30-60 (based on level) less damage.Duration: 1.5sCooldown: 55s and
  OvergrowthOvergrowthGain permanent max health when minions or monsters die near you., not the Inspiration
  bootsBootsSlightly increases Move Speed swap other matchups get; both picks trace to Renekton specifically in Federals1's own reasoning
 FlashFlashTeleports you a short distance toward your cursor. +
  IgniteIgniteDeals true damage over time to target enemy champion and reduces healing effects on them for the duration.
Matchup Dynamics
How This Matchup Works
Federals1 calls this a Skill matchup, naming Renekton twice in his own reasoning: Bone PlatingBone PlatingAfter taking damage from an enemy champion, the next 3 spells or attacks you receive from them deal 30-60 (based on level) less damage.Duration: 1.5sCooldown: 55s covers the combo-burst threat, and OvergrowthOvergrowthGain permanent max health when minions or monsters die near you. beats  RevitalizeRevitalizeGain 5% Heal and Shield Power.Heals and shields you cast or receive are 10% stronger on targets below 40% health. because he groups Renekton with Rell as a shield-breaker matchup. His Fury resource only builds through active combat, so poke that keeps him out of range starves the combo before it starts.
  Bramble VestBramble Vest30 ArmorThornsWhen hit by an Attack, deal magic damage to the attacker and apply 40% Wounds for 3 seconds if they are a champion. into
  ThornmailThornmail150 Health75 ArmorThornsWhen struck by an Attack, deal magic damage to the attacker and apply 40% Wounds for 3 seconds if they are a champion. cuts the healing
  Cull the MeekQ – Cull the MeekRenekton swings his blade, dealing moderate physical damage to all targets around him, and heals for a small portion of the damage dealt. would otherwise give back, and the lane tends to flip once
  Liandry's TormentLiandry's TormentCharge up in combat to deal high damage over time, especially against durable enemies is online.
Early Game (1-5)
Renekton Favored - His stun-into-empowered-combo threat is heaviest here, before your items complete. Poke to deny Fury generation rather than trading into his strongest window.
Mid Game (6-11)
Mordekaiser Favored - Liandry's TormentLiandry's TormentCharge up in combat to deal high damage over time, especially against durable enemies lands, and Bramble VestBramble Vest30 ArmorThornsWhen hit by an Attack, deal magic damage to the attacker and apply 40% Wounds for 3 seconds if they are a champion. is already cutting his sustain. His kit doesn't scale as hard into this stretch as yours does.
Late Game (12+)
Skill Matchup - His own coaching leans on a shield-breaking pickup here, complicating the stasis Zhonya's is supposed to buy.  Realm of DeathR – Realm of DeathMordekaiser drags his victim to a different dimension with him and steals a portion of their stats. If he kills them, he keeps the stats until the victim respawns. still threatens to end the fight outright if his defenses are down.
Key Interactions
- Poke denies the Fury his combo runs on: His resource only builds through active combat. An isolated Q that keeps him out of auto range starves the stun-into-empowered-Q string before it ever starts.
- Bone PlatingBone PlatingAfter taking damage from an enemy champion, the next 3 spells or attacks you receive from them deal 30-60 (based on level) less damage.Duration: 1.5sCooldown: 55s answers the combo directly: Federals1's guide names him by name, alongside Sett, as the reason this pick exists: a multi-hit burst string loses a real chunk of its damage to the proc shield.
- W has to cover the empowered stun: His Fury-empowered
 Ruthless PredatorW – Ruthless PredatorRenekton slashes his target twice, dealing moderate physical damage and stuns them for 0.75 seconds. locks down a longer window than the base version. A trade without the shield up turns that stun into a much worse combo than it should be.
 - OvergrowthOvergrowthGain permanent max health when minions or monsters die near you. exists because he's a coached shield-breaker: Federals1 groups him with Rell as a matchup where a shield-cutting pickup shows up often enough to plan the rune page around; the extra base health matters more than a RevitalizeRevitalizeGain 5% Heal and Shield Power.Heals and shields you cast or receive are 10% stronger on targets below 40% health. boost that might not survive the fight anyway.
Mordekaiser
Strengths
- His Fury resource only builds through combat, so denying his approach with poke also denies the combo it fuels
- Bramble VestBramble Vest30 ArmorThornsWhen hit by an Attack, deal magic damage to the attacker and apply 40% Wounds for 3 seconds if they are a champion. and ThornmailThornmail150 Health75 ArmorThornsWhen struck by an Attack, deal magic damage to the attacker and apply 40% Wounds for 3 seconds if they are a champion. both apply grievous wounds, cutting straight into the healing Cull the MeekQ – Cull the MeekRenekton swings his blade, dealing moderate physical damage to all targets around him, and heals for a small portion of the damage dealt. is built to provide
- Liandry's percent-health burn punishes a kit that doesn't scale as hard into the mid game as yours does
Weaknesses
- His stun-into-empowered combo hits hardest before your items complete, and Bone PlatingBone PlatingAfter taking damage from an enemy champion, the next 3 spells or attacks you receive from them deal 30-60 (based on level) less damage.Duration: 1.5sCooldown: 55s only blunts it rather than erasing it
- Federals1's own guide marks him as a coached shield-breaker matchup, complicating the stasis window Zhonya's is supposed to buy late
 Slice and DiceE – Slice and DiceRenekton dashes, dealing damage to units along the way. Empowered, Renekton deals bonus damage and reduces the Armor of units hit. gives him enough of a dash to dodge a poorly timed Q or E, unlike a fully immobile threat
Renekton
Strengths
- Fury-empowered abilities turn a normal stun and normal
 healHealRestores Health and grants Move Speed to you and target allied champion. into a much bigger burst-and-sustain window
 - Slice and DiceE – Slice and DiceRenekton dashes, dealing damage to units along the way. Empowered, Renekton deals bonus damage and reduces the Armor of units hit. adds real mobility to dodge a telegraphed cast, more than most early-game bullies get
- A front-loaded kit that wins the lane outright if it closes the distance before items complete on the other side
Weaknesses
- Fury only builds through active combat, so a Mordekaiser who pokes from range denies the resource before the combo starts
- Bramble VestBramble Vest30 ArmorThornsWhen hit by an Attack, deal magic damage to the attacker and apply 40% Wounds for 3 seconds if they are a champion. and ThornmailThornmail150 Health75 ArmorThornsWhen struck by an Attack, deal magic damage to the attacker and apply 40% Wounds for 3 seconds if they are a champion. both cut into the self-healHealRestores Health and grants Move Speed to you and target allied champion. his combo depends on
- Doesn't scale into the mid game as hard as Mordekaiser does once Liandry's TormentLiandry's TormentCharge up in combat to deal high damage over time, especially against durable enemies completes
Power Curve Comparison EXPERIMENTAL
Power Curve Visualization
Win Conditions
Mordekaiser's Win Condition
- Poke to deny his Fury; a combo that never gets to start never gets to matter
- Bank W ahead of his all-in window; a Fury-empowered stun without the shield up turns into a much worse trade
- Build through Bramble VestBramble Vest30 ArmorThornsWhen hit by an Attack, deal magic damage to the attacker and apply 40% Wounds for 3 seconds if they are a champion. into ThornmailThornmail150 Health75 ArmorThornsWhen struck by an Attack, deal magic damage to the attacker and apply 40% Wounds for 3 seconds if they are a champion.; both cut straight into the healing his combo is built to provide
- Finish Liandry's TormentLiandry's TormentCharge up in combat to deal high damage over time, especially against durable enemies and let the burn work through a kit that stops scaling as hard from here
Renekton's Win Condition
- Front-loads the stun-into-empowered-combo threat before Mordekaiser's items complete
- Builds Fury through active combat, threatening a bigger burst and a bigger healHealRestores Health and grants Move Speed to you and target allied champion. the longer he stays in range
- Picks up a shield-breaking item often enough that Federals1's own guide plans the rune page around it
- Uses Slice and Dice's mobility to close distance a fully immobile bruiser couldn't
Laning Phase Guide
| Level/Phase | Mordekaiser | Renekton |
|---|---|---|
| Level 1 |  Doran's RingDoran's RingGood starting item for casters and a potion. Poke from range rather than trading auto for auto; every hit you avoid is Fury he doesn't get to bank. Doran's RingDoran's RingGood starting item for casters and a potion. Poke from range rather than trading auto for auto; every hit you avoid is Fury he doesn't get to bank. |
Looks to force early contact and start building Fury toward the empowered combo; the lane favors him the longer he stays in range uncontested. |
| Level 2 | Take the ability the trade calls for and keep the poke going; there is no reason to hand him free Fury this early. | Presses for the stun the moment W is up; a landed Ruthless PredatorW – Ruthless PredatorRenekton slashes his target twice, dealing moderate physical damage and stuns them for 0.75 seconds. this early can snowball the rest of the lane. |
| Level 3 | The whole kit is live now: lead with the isolated Q, keep the shield ready for a Fury-empowered stun, and save the pull for a target already stuck on a last hit. | Full kit too, and this is close to his best relative window; a clean stun into empowered Q punishes any Mordekaiser without the shield up. |
| Level 4-5 | Keep the poke going and avoid extended stands; his combo threat is still ahead of your item spikes here. | Still the aggressor if the lane is close; his front-loaded kit wants to end things before item power evens it out. |
| Level 6 | Realm of DeathR – Realm of DeathMordekaiser drags his victim to a different dimension with him and steals a portion of their stats. If he kills them, he keeps the stats until the victim respawns. adds the answer to a committed all-in;  DominusR – DominusRenekton transforms into the Tyrant form, gaining bonus Health and dealing damage to enemies around him. While in this form, Renekton gains Fury periodically. gives him real dueling power too, so respect both ultimates equally. DominusR – DominusRenekton transforms into the Tyrant form, gaining bonus Health and dealing damage to enemies around him. While in this form, Renekton gains Fury periodically. gives him real dueling power too, so respect both ultimates equally. |
DominusR – DominusRenekton transforms into the Tyrant form, gaining bonus Health and dealing damage to enemies around him. While in this form, Renekton gains Fury periodically. adds bonus stats and sustained damage for its duration, a real spike, though Realm of DeathR – Realm of DeathMordekaiser drags his victim to a different dimension with him and steals a portion of their stats. If he kills them, he keeps the stats until the victim respawns. threatens to end the fight outright if he over-commits. |
| Level 7-8 |  RiftmakerRiftmaker70 Ability Power350 Health15 Ability HasteVoid CorruptionFor each second in combat with enemy champions, deal 2% bonus damage, up to 8%. rounds out the sustain, and Bramble VestBramble Vest30 ArmorThornsWhen hit by an Attack, deal magic damage to the attacker and apply 40% Wounds for 3 seconds if they are a champion. is already cutting into his self-healHealRestores Health and grants Move Speed to you and target allied champion. by this point. RiftmakerRiftmaker70 Ability Power350 Health15 Ability HasteVoid CorruptionFor each second in combat with enemy champions, deal 2% bonus damage, up to 8%. rounds out the sustain, and Bramble VestBramble Vest30 ArmorThornsWhen hit by an Attack, deal magic damage to the attacker and apply 40% Wounds for 3 seconds if they are a champion. is already cutting into his self-healHealRestores Health and grants Move Speed to you and target allied champion. by this point. |
Item power starts catching up on both sides; the lane's early edge matters less with every passing level. |
| Level 9 | Liandry's TormentLiandry's TormentCharge up in combat to deal high damage over time, especially against durable enemies nears completion; this is usually where the lane's momentum swings for good. |
ThornmailThornmail150 Health75 ArmorThornsWhen struck by an Attack, deal magic damage to the attacker and apply 40% Wounds for 3 seconds if they are a champion. looming on the other side of the matchup makes every future all-in worse for his sustain specifically. |
Power Spikes
Level Spikes
| Mordekaiser | Renekton | ||
|---|---|---|---|
| Level | Description | Level | Description |
| 3 | Minor Full basic combo online; isolated Q starts denying the Fury his combo needs | 2 | Major The stun-into-combo window opens the moment W lands its first point |
| 6 | Major Realm of DeathR – Realm of DeathMordekaiser drags his victim to a different dimension with him and steals a portion of their stats. If he kills them, he keeps the stats until the victim respawns. answers a committed all-in, though DominusR – DominusRenekton transforms into the Tyrant form, gaining bonus Health and dealing damage to enemies around him. While in this form, Renekton gains Fury periodically. gives him real power too |
6 | Major DominusR – DominusRenekton transforms into the Tyrant form, gaining bonus Health and dealing damage to enemies around him. While in this form, Renekton gains Fury periodically. adds bonus stats and a damaging aura for its duration |
| 9 | Major Liandry's TormentLiandry's TormentCharge up in combat to deal high damage over time, especially against durable enemies nears completion, right as the anti-healHealRestores Health and grants Move Speed to you and target allied champion. build is fully online |
11 | Minor Item power starts catching up on both sides, narrowing his early edge |
Item Spikes
| Mordekaiser | Renekton | ||
|---|---|---|---|
| Item | Description | Item | Description |
| Bramble VestBramble Vest30 ArmorThornsWhen hit by an Attack, deal magic damage to the attacker and apply 40% Wounds for 3 seconds if they are a champion. |
First buy specifically to cut into Cull the Meek's healing |  Serpent's FangSerpent's Fang55 Attack Damage15 LethalityShield ReaverDamaging an enemy champion reduces Shields they gain by % for 3 seconds. If they were not already affected by Shield Reaver, reduce Shields on them by %. Serpent's FangSerpent's Fang55 Attack Damage15 LethalityShield ReaverDamaging an enemy champion reduces Shields they gain by % for 3 seconds. If they were not already affected by Shield Reaver, reduce Shields on them by %. |
The coached shield-breaking pickup Federals1's guide plans the OvergrowthOvergrowthGain permanent max health when minions or monsters die near you. choice around |
| RiftmakerRiftmaker70 Ability Power350 Health15 Ability HasteVoid CorruptionFor each second in combat with enemy champions, deal 2% bonus damage, up to 8%. |
Sustain and the damage amp once the lane stabilizes |  Black CleaverBlack CleaverDealing physical damage to enemy champions reduces their Armor Black CleaverBlack CleaverDealing physical damage to enemy champions reduces their Armor |
Common current pickup; shred stacks through repeated short trades |
 Plated SteelcapsPlated SteelcapsEnhances Move Speed and reduces incoming basic attack damage Plated SteelcapsPlated SteelcapsEnhances Move Speed and reduces incoming basic attack damage |
Standard armor pick into a physical-heavy combo kit |  Death's DanceDeath's Dance60 Attack Damage50 Armor15 Ability HasteIgnore PainA percentage of damage taken is dealt to you over 3 seconds instead.DefyWhen a champion that you damaged within 3 seconds dies, cleanse Ignore Pain's... Death's DanceDeath's Dance60 Attack Damage50 Armor15 Ability HasteIgnore PainA percentage of damage taken is dealt to you over 3 seconds instead.DefyWhen a champion that you damaged within 3 seconds dies, cleanse Ignore Pain's... |
Delays burst damage in a longer fight once the early lane edge is behind him |
| Liandry's TormentLiandry's TormentCharge up in combat to deal high damage over time, especially against durable enemies |
The burn that punishes a kit which stops scaling as hard from here | ||
| ThornmailThornmail150 Health75 ArmorThornsWhen struck by an Attack, deal magic damage to the attacker and apply 40% Wounds for 3 seconds if they are a champion. |
Closes the row; grievous wounds plus a physical damage reflect for a duelist who lives on autos | ||
Best Build for Mordekaiser
Starting Items
Core Items
Bramble VestBramble Vest30 ArmorThornsWhen hit by an Attack, deal magic damage to the attacker and apply 40% Wounds for 3 seconds if they are a champion. (grievous wounds), RiftmakerRiftmaker70 Ability Power350 Health15 Ability HasteVoid CorruptionFor each second in combat with enemy champions, deal 2% bonus damage, up to 8%. (sustain), Plated SteelcapsPlated SteelcapsEnhances Move Speed and reduces incoming basic attack damage (armor), Liandry's TormentLiandry's TormentCharge up in combat to deal high damage over time, especially against durable enemies (burn), ThornmailThornmail150 Health75 ArmorThornsWhen struck by an Attack, deal magic damage to the attacker and apply 40% Wounds for 3 seconds if they are a champion. (reflect)
Runes
Primary: The keystone page holds its usual shape; the real story on this row is Resolve, where Federals1 names Renekton twice
Secondary: Bone PlatingBone PlatingAfter taking damage from an enemy champion, the next 3 spells or attacks you receive from them deal 30-60 (based on level) less damage.Duration: 1.5sCooldown: 55s and OvergrowthOvergrowthGain permanent max health when minions or monsters die near you., not the Inspiration bootsBootsSlightly increases Move Speed swap other matchups get; both picks trace to Renekton specifically in Federals1's own reasoning
Summoner Spells
FlashFlashTeleports you a short distance toward your cursor. + IgniteIgniteDeals true damage over time to target enemy champion and reduces healing effects on them for the duration.
Priority Build Path
Bramble Vest
Grievous wounds from the first back, aimed squarely at Cull the Meek's healing
Riftmaker
Sustain and the damage amp once the lane settles into extended contact
Plated Steelcaps
Armor into a kit that deals most of its damage through physical hits
Liandry's Torment
The percent-health burn that widens the gap once his scaling falls behind
Thornmail
Closes the matchup path; more grievous wounds plus a physical damage reflect
Situational Adjustments
 Zhonya's HourglassZhonya's HourglassActivate to become invincible but unable to take actions: his coached shield-breaking pickup lands; stasis buys back the stall W alone can no longer provide
 Spirit VisageSpirit VisageIncreases Health and healing effects: the fight runs long enough for the reactivate healHealRestores Health and grants Move Speed to you and target allied champion. to matter more than another point of armor
Key Patterns
Lethal Combos
R >  E >
E >  Q >
Q >  W
W
E > W > Q > AA
Slice and DiceE – Slice and DiceRenekton dashes, dealing damage to units along the way. Empowered, Renekton deals bonus damage and reduces the Armor of units hit., stuns with a Fury-empowered Ruthless PredatorW – Ruthless PredatorRenekton slashes his target twice, dealing moderate physical damage and stuns them for 0.75 seconds., then Cull the Meek's empowered healHealRestores Health and grants Move Speed to you and target allied champion.-and-damage closes the string.
Trading Combos
Q > E > W
AA > W > Q
Cull the MeekQ – Cull the MeekRenekton swings his blade, dealing moderate physical damage to all targets around him, and heals for a small portion of the damage dealt. for the damage-and-healHealRestores Health and grants Move Speed to you and target allied champion. close.
Lethal Thresholds
- Mordekaiser Kill Range: No published percentage; the read is denying Fury with poke early, then letting Liandry's and the anti-healHealRestores Health and grants Move Speed to you and target allied champion. build decide the fight once it runs long.
- Renekton Kill Range: Fury crosses its threshold through sustained combat, so a target who never lets him stay in range denies the empowered half of his kit entirely.
- Critical Levels: 2-3 (his stun-combo window is at its sharpest) / 6 (DominusR – DominusRenekton transforms into the Tyrant form, gaining bonus Health and dealing damage to enemies around him. While in this form, Renekton gains Fury periodically. adds real power, though Realm of DeathR – Realm of DeathMordekaiser drags his victim to a different dimension with him and steals a portion of their stats. If he kills them, he keeps the stats until the victim respawns. still threatens to end the fight) / 9 (Liandry's completes, the anti-healHealRestores Health and grants Move Speed to you and target allied champion. build is fully online)
Level by Level Game Plan
| Level | Primary Goal | Lane Position | Trading Opportunities | Kill Windows | Setup Opportunities |
|---|---|---|---|---|---|
| 1 | Poke, don't trade | Wave edge, deny auto range | Q on cooldown; avoid standing in melee | Low | Every avoided hit is Fury he doesn't bank |
| 2 | Keep denying Fury | Hold space without overextending | Second basic ability joins Q | Low | A landed stun this early can snowball for him |
| 3 | Full trade kit online | Near minions for a clean isolated angle | Q leads, W covers a Fury-empowered stun | Medium, careful of his best relative window | Bank W before any real exchange |
| 4-5 | Ride out his strongest window | Hold the wave, avoid extended stands | Short pokes only, no forced fights | Low | His combo threat is still ahead of your item spikes |
| 6 | R answers the all-in | Respect DominusR – DominusRenekton transforms into the Tyrant form, gaining bonus Health and dealing damage to enemies around him. While in this form, Renekton gains Fury periodically. as real dueling power too |
Only commit with a cooldown read on both sides | High off a correct read | Realm of DeathR – Realm of DeathMordekaiser drags his victim to a different dimension with him and steals a portion of their stats. If he kills them, he keeps the stats until the victim respawns. ends the fight if he over-commits |
| 7-8 | RiftmakerRiftmaker70 Ability Power350 Health15 Ability HasteVoid CorruptionFor each second in combat with enemy champions, deal 2% bonus damage, up to 8%. stick pressure |
Hold lane as item power evens out | Bramble VestBramble Vest30 ArmorThornsWhen hit by an Attack, deal magic damage to the attacker and apply 40% Wounds for 3 seconds if they are a champion. already cutting his sustain |
Medium | Track when his own build completes |
| 9+ | Liandry's nears completion | Push for the longer fight now that the burn is worth more than a quick poke | Full pattern once the burn and anti-healHealRestores Health and grants Move Speed to you and target allied champion. are both online |
High | The lane's early edge is behind him now |
| Mid Game (11-16) | Convert the anti-healHealRestores Health and grants Move Speed to you and target allied champion. lead |
Group or side depending on priority | Realm of DeathR – Realm of DeathMordekaiser drags his victim to a different dimension with him and steals a portion of their stats. If he kills them, he keeps the stats until the victim respawns. answers anything he starts alone |
High on a caught cooldown | Track his shield-breaking item timing |
| Late Game (16+) | Teamfight around denying his sustain | Frontline, aware of the shield-break threat | A landed Realm of DeathR – Realm of DeathMordekaiser drags his victim to a different dimension with him and steals a portion of their stats. If he kills them, he keeps the stats until the victim respawns. takes him or a carry clean out of the fight |
Whenever his defensive tools are down | A shield break on his team makes every W count for less |
First Back Goals
Teamfight Tips
| Aspect | Mordekaiser | Renekton |
|---|---|---|
| Primary Role | Isolation and burn threat; a fight that runs long favors the anti-healHealRestores Health and grants Move Speed to you and target allied champion. build over his front-loaded burst |
Frontline duelist who wants to open the fight and cash Fury into a burst-and-sustain window before it fades |
| Target Priority | Renekton himself once his defensive cooldowns are down Whoever his empowered combo threatens most Backline targets his frontline commitment leaves open |
Frontline contact to build Fury fast Whoever a landed stun opens a path to |
| Objective Control | Start pit fights with the anti-healHealRestores Health and grants Move Speed to you and target allied champion. already applied Punish an early DominusR – DominusRenekton transforms into the Tyrant form, gaining bonus Health and dealing damage to enemies around him. While in this form, Renekton gains Fury periodically. commitment with an immediate Realm of DeathR – Realm of DeathMordekaiser drags his victim to a different dimension with him and steals a portion of their stats. If he kills them, he keeps the stats until the victim respawns. |
Looks to open the fight before Fury fades between engagements Uses DominusR – DominusRenekton transforms into the Tyrant form, gaining bonus Health and dealing damage to enemies around him. While in this form, Renekton gains Fury periodically. to hold a contest rather than concede it |
| Positioning | Keep W timed for his stun attempt, not the follow-up Commit R only once his ultimate and dash are both accounted for |
Looks to dash in on a target already separated from peel Times the stun for when Fury is confirmed above the threshold |
| Other Tips | A fight that stretches past his Fury window favors the anti-healHealRestores Health and grants Move Speed to you and target allied champion. build over his burst His shield-breaking pickup is worth tracking specifically for how much it changes your W math |
Fury fades between fights, so he wants to open contact rather than wait for oneDominusR – DominusRenekton transforms into the Tyrant form, gaining bonus Health and dealing damage to enemies around him. While in this form, Renekton gains Fury periodically. is a real damage source during its window, not just a bigger health pool |