 UpMatched
 Shen vs Gnar Matchup Guide
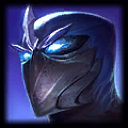
Shen
Top Lane Tank
The Eye of Twilight — Global tank with CC and anti-auto zone

Gnar
Top Lane Marksman
Transforming duelist who swaps mobile mini-form poke for hard-engage mega-form control
Champ Select Cheat Sheet — Shen vs Gnar
 Grasp of the UndyingGrasp of the UndyingEvery 4s your next attack on a champion deals bonus magic damage, heals you, and permanently increases your health.,
  Shield BashShield BashWhenever you gain a shield, your next basic attack against a champion deals bonus adaptive damage.,
  Second WindSecond WindAfter taking damage from an enemy champion heal back some missing health over time.,
  OvergrowthOvergrowthGain permanent max health when minions or monsters die near you.
 Approach VelocityApproach VelocityBonus MS towards nearby enemy champions that are movement impaired, increased for enemy champions that you impair.,
  Magical FootwearMagical FootwearYou get free boots at 12 min but you cannot buy boots before then. Each takedown you get makes your boots come 45s sooner.
 FlashFlashTeleports you a short distance toward your cursor. +
  TeleportTeleportAfter a brief channel, become untargetable and travel to an allied unit. Upgrades into Unleashed Teleport, which significantly increases travel speed. (
 IgniteIgniteDeals true damage over time to target enemy champion and reduces healing effects on them for the duration. if kill pressure)
 Doran's ShieldDoran's ShieldGood defensive starting item +
  Health PotionHealth PotionConsume to restore Health over time
 Tiamat
 Titanic Hydra
 Plated Steelcaps
 Hollow Radiance/Spirit VisageTiamat (1200g)
Matchup Dynamics
How This Matchup Works
Shen wins through short, forced trades with `E –  Shadow DashE – Shadow DashShen dashes in a direction, taunting enemies in his path.` into `Q –
  Twilight AssaultQ – Twilight AssaultShen recalls his spirit blade to attack with it, dealing damage based on the target's max health.` and by converting prio into global plays with `R –
  Stand UnitedR – Stand UnitedShen shields target allied champion from incoming damage, and soon after teleports to their location.`. Gnar's main threat is Boomerang Throw/Boulder Toss + Hop/Crunch windows that beat extended fights. The lane pivots at level 2 (taunt threat) and again at 6 when both ultimates unlock.
Early Game (1-5)
Gnar Favored - Gnar outranges or outdamages early; avoid long trades until wave advantage or jungle cover; trade only after key spell is used.
Mid Game (6-11)
Skill Matchup - Item spikes and TP timers decide skirmishes; play around objective timers and side waves.
Late Game (12+)
Gnar Favored - Gnar has superior dueling/oneshot late; avoid isolated fights and cross-map with `R`.
Key Interactions
- W –
 Spirit's RefugeW – Spirit's RefugeAttacks that would hit Shen or his allies near his spirit blade are blocked. vs autos: Cast W – Spirit's RefugeW – Spirit's RefugeAttacks that would hit Shen or his allies near his spirit blade are blocked. as Gnar commits to an auto/Q weave; 1.75s block denies on-hits; punish for ~2 seconds before their next cooldown.
 - E – Shadow DashE – Shadow DashShen dashes in a direction, taunting enemies in his path. into Q – Boomerang Throw/Boulder Toss/W – Hyper/Wallop: Buffer E – Shadow DashE – Shadow DashShen dashes in a direction, taunting enemies in his path. through Q – Boomerang Throw/Boulder Toss wind-up or after W – Hyper/Wallop miss; you have ~8–12s before it returns at early ranks to trade then disengage.
- Blade return slow: Drag Spirit Blade through Gnar with Q – Twilight AssaultQ – Twilight AssaultShen recalls his spirit blade to attack with it, dealing damage based on the target's max health.; on-hit slow for 2s while they move away lets you stick for two autos.
- E – Hop/Crunch punish: Bait E – Hop/Crunch; when it is on cooldown (often ≥10s early), walk up with wave advantage and taunt-flashFlashTeleports you a short distance toward your cursor. for a forced trade or kill.
Shen
Strengths
- Point-and-click global with `R – Stand UnitedR – Stand UnitedShen shields target allied champion from incoming damage, and soon after teleports to their location.` to create 5v4s
- `W – Spirit's RefugeW – Spirit's RefugeAttacks that would hit Shen or his allies near his spirit blade are blocked.` blocks autos for 1.75s to flip trades
- `E – Shadow DashE – Shadow DashShen dashes in a direction, taunting enemies in his path.` taunt sets guaranteed `Q`-empowered autos
- Can control waves with TiamatTiamatMelee attacks hit nearby enemies/Titanic for safe crashes
Weaknesses
- Energy gated if `E` whiffs; lose lane if wave is bad
- Low sustained DPS pre-Titanic; extended fights can fail
- Predictable engage angle; telegraphed `E` can be dodged
- Vulnerable to heavy poke before level 6
Gnar
Strengths
- Gnar has lane-winning burst/duel windows with `Boomerang Throw/Boulder Toss` or `Hop/Crunch`
- Power spikes on first item and level 6 create dive threat
- Wave control tools to punish failed crashes
Weaknesses
- Telegraphed patterns: punish after `Hyper/Wallop`/`Boomerang Throw/Boulder Toss` used
- Struggles to match Shen's global plays mid game
- Can be denied by taunt-flashFlashTeleports you a short distance toward your cursor. under tower if dash is down
Power Curve Comparison EXPERIMENTAL
Power Curve Visualization
Win Conditions
Shen's Win Condition
- Hit level 2 first; thin to 3-4 caster lead; taunt on cooldown gaps; crash wave 3 for safe recall/ward
- Freeze 5-6 minions after first bounce; force trades when blade is behind enemy
- Buy TiamatTiamatMelee attacks hit nearby enemies early; maintain slow push to threaten dive with jungler at 6
- Track `FlashFlashTeleports you a short distance toward your cursor.`; use taunt-flashFlashTeleports you a short distance toward your cursor. to chain CC into Titanic execute under turret
Gnar's Win Condition
- Keep wave mid-lane; trade when `W – Spirit's RefugeW – Spirit's RefugeAttacks that would hit Shen or his allies near his spirit blade are blocked.` is down; punish Shen's long `E` cooldown
- Hold disengage tool (Hop/Crunch) for taunt; bait it then re-engage once Shen wastes `E`
- Stack wave for level 6 dive; call jungler on cannon wave crash
- Ward river/tri early; deny Shen's level 2 push with jungle pressure
Laning Phase Guide
| Level/Phase | Shen | Gnar |
|---|---|---|
| Level 1 | Start Q; place Spirit Blade behind enemy on spawn; last-hit only to avoid push if jungler pathing top; trade single auto after Q – Boomerang Throw/Boulder Toss used; ward river 2:20 if slow pushing | Start Q – Boomerang Throw/Boulder Toss or E – Hop/Crunch depending on champ; poke on last-hits; stand outside blade return line; ward 1:25 pixel if cheesing brush |
| Level 2 | Skill E; stack wave 2; threaten E>Q autos when Hop/Crunch or Hyper/Wallop is down; crash wave 3 at ~2:45 for reset or  deep wardDeep WardYour wards in the enemy jungle are Deep, gaining Health and Duration.Level 9: Wards in the river are also Deep. tri/river deep wardDeep WardYour wards in the enemy jungle are Deep, gaining Health and Duration.Level 9: Wards in the river are also Deep. tri/river |
Respect Shen level 2 all-in; keep minion wave thin; hold E – Hop/Crunch to dodge taunt; ping jungler if wave is stacking |
| Level 3 | Take W; bait trade then cast W on blade to block autos for 1.75s; exit before minion aggro flips; keep wave near your third melee | Use W – Hyper/Wallop or shield to short trade; avoid fighting inside `W – Spirit's RefugeW – Spirit's RefugeAttacks that would hit Shen or his allies near his spirit blade are blocked.`; trim wave to stop freezes |
| Level 4-5 | Hold E for gank or Hop/Crunch; set up taunt-flashFlashTeleports you a short distance toward your cursor. if Hop/Crunch is burned; base on cannon crash for TiamatTiamatMelee attacks hit nearby enemies or  bootsBootsSlightly increases Move Speed bootsBootsSlightly increases Move Speed |
Track taunt-flashFlashTeleports you a short distance toward your cursor.; keep distance when E – Hop/Crunch is down; call jungler on stacked wave to break freeze |
| Level 6 | Unlock R; if wave slow-pushed, hover for `R`; ping cooldown; punish  GNAR!R – GNAR!Mega Gnar throws everything around him in a chosen direction, dealing damage and slowing them. Any enemy that hits a wall is stunned and takes bonus damage. long cooldowns by cross-mapping GNAR!R – GNAR!Mega Gnar throws everything around him in a chosen direction, dealing damage and slowing them. Any enemy that hits a wall is stunned and takes bonus damage. long cooldowns by cross-mapping |
Track Shen R; ping timers; threaten all-in with R – GNAR!R – GNAR!Mega Gnar throws everything around him in a chosen direction, dealing damage and slowing them. Any enemy that hits a wall is stunned and takes bonus damage. when Shen R is down; deny roams by hard-pushing on R channel |
| Level 7-8 | Complete TiamatTiamatMelee attacks hit nearby enemies/Titanic component; perma shove then move to river for objective setup; shadow jungler on Herald timers |
Match shove with waveclear or freeze 6+ minions near tower; punish Shen when E is down >15s at rank 1-2 |
| Level 9 | Max Q; threaten constant slow via blade hits; transition to side-lane; keep TP and R desynced to cover map | Respect Q rank 5 DPS; pre-place vision in river/tri; play for item spike and jungler pressure |
Power Spikes
Level Spikes
| Shen | Gnar | ||
|---|---|---|---|
| Level | Description | Level | Description |
| 2 | Minor E unlock + Q slow enables forced short trades off cooldowns | 3 | Major Full combo access creates first all-in window |
| 6 | Major R opens cross-map plays; punish enemy when they show bot | 6 | Critical Ultimate online for dive/duel threat |
| 9 | Major Q max grants high DPS and 50% AS on blade-hit empowers autos | 9 | Minor Primary ability max; lane control improves |
| 13 | Minor Lower E CD allows taunt every ~12–10s with ability haste | ||
Item Spikes
| Shen | Gnar | ||
|---|---|---|---|
| Item | Description | Item | Description |
| TiamatTiamatMelee attacks hit nearby enemies (1200g) |
Wave control to crash on command; enables roam setup |  Black CleaverBlack CleaverDealing physical damage to enemy champions reduces their Armor (3000g) Black CleaverBlack CleaverDealing physical damage to enemy champions reduces their Armor (3000g) |
Armor shred improves extended trades |
| Titanic HydraTitanic HydraDeals area of effect damage based on owner's health (3300g) |
Burst on-hit + HP converts trades to kills |  StridebreakerStridebreaker40 Attack Damage25% Attack Speed450 HealthCleaveAttacks deal physical damage to nearby enemies.Breaking ShockwaveDeal physical damage and Slow nearby enemies by 35%.Gain 35% decaying Move Speed per ch... (3300g) StridebreakerStridebreaker40 Attack Damage25% Attack Speed450 HealthCleaveAttacks deal physical damage to nearby enemies.Breaking ShockwaveDeal physical damage and Slow nearby enemies by 35%.Gain 35% decaying Move Speed per ch... (3300g) |
Gap close to punish taunt whiffs |
| Hollow RadianceHollow RadianceImmobilize enemies to gain a shield. Activate to run faster at opponents. (2800g) |
Immolate waveclear + tank stats for front line |  Death's DanceDeath's Dance60 Attack Damage50 Armor15 Ability HasteIgnore PainA percentage of damage taken is dealt to you over 3 seconds instead.DefyWhen a champion that you damaged within 3 seconds dies, cleanse Ignore Pain's... (3300g) Death's DanceDeath's Dance60 Attack Damage50 Armor15 Ability HasteIgnore PainA percentage of damage taken is dealt to you over 3 seconds instead.DefyWhen a champion that you damaged within 3 seconds dies, cleanse Ignore Pain's... (3300g) |
Delays burst; enables risky skirmishes |
| Plated SteelcapsPlated SteelcapsEnhances Move Speed and reduces incoming basic attack damage (1200g) |
Cuts basic attack damage; crucial vs AAs | ||
 Spirit VisageSpirit VisageIncreases Health and healing effects (2700g) Spirit VisageSpirit VisageIncreases Health and healing effects (2700g) |
Boosts shields/heals; synergizes with kit | ||
Best Build for Shen
Starting Items
Doran's ShieldDoran's ShieldGood defensive starting item + Health PotionHealth PotionConsume to restore Health over time
Core Items
TiamatTiamatMelee attacks hit nearby enemies → Titanic HydraTitanic HydraDeals area of effect damage based on owner's health → Plated SteelcapsPlated SteelcapsEnhances Move Speed and reduces incoming basic attack damage → Hollow RadianceHollow RadianceImmobilize enemies to gain a shield. Activate to run faster at opponents./Spirit VisageSpirit VisageIncreases Health and healing effects
Runes
Primary: Grasp of the UndyingGrasp of the UndyingEvery 4s your next attack on a champion deals bonus magic damage, heals you, and permanently increases your health., Shield BashShield BashWhenever you gain a shield, your next basic attack against a champion deals bonus adaptive damage., Second WindSecond WindAfter taking damage from an enemy champion heal back some missing health over time., OvergrowthOvergrowthGain permanent max health when minions or monsters die near you.
Secondary: Approach VelocityApproach VelocityBonus MS towards nearby enemy champions that are movement impaired, increased for enemy champions that you impair., Magical FootwearMagical FootwearYou get free boots at 12 min but you cannot buy boots before then. Each takedown you get makes your boots come 45s sooner.
Summoner Spells
FlashFlashTeleports you a short distance toward your cursor. + TeleportTeleportAfter a brief channel, become untargetable and travel to an allied unit. Upgrades into Unleashed Teleport, which significantly increases travel speed. (IgniteIgniteDeals true damage over time to target enemy champion and reduces healing effects on them for the duration. if kill pressure)
Priority Build Path
Tiamat
Wave control for crash and roam timings
Titanic Hydra
HP-to-damage conversion for duels and sieges
Plated Steelcaps
Reduces AA damage; early survivability
Hollow Radiance
AOE burn to push and front line
Situational Adjustments
- Spirit VisageSpirit VisageIncreases Health and healing effects: Enemy AP + shields/heals to amplify R/W value
 ThornmailThornmail150 Health75 ArmorThornsWhen struck by an Attack, deal magic damage to the attacker and apply 40% Wounds for 3 seconds if they are a champion.: Vs heavy sustain/AA; pair with taunt for GW
 Kaenic RookernKaenic Rookern400 Health80 Magic Resist100% Base Health RegenMagebaneAfter not taking magic damage for 15 seconds, gain a magic shield.: Vs burst AP; large magic shield for engages
Key Patterns
Lethal Combos
E – Shadow Dash > Q (blade hits) > Auto > Titanic Hydra reset > Auto > Ignite
Hop/Crunch to engage/disengage > Boomerang Throw/Boulder Toss damage window > ultimate to finish
Threatens kill if Shen W is down andFlashFlashTeleports you a short distance toward your cursor. unavailable
Trading Combos
Q pull-through slow > Auto > step inside W – Spirit's Refuge for 1.75s > Auto then back
Short trade with Boomerang Throw/Boulder Toss > auto reset if available > disengage with Hop/Crunch
Punish when Shen E is down >12s earlyLethal Thresholds
- Shen Kill Range: Post-Titanic + IgniteIgniteDeals true damage over time to target enemy champion and reduces healing effects on them for the duration.: E hit sets kill at ~40% HP if Flashless; under tower use taunt-flashFlashTeleports you a short distance toward your cursor. + Hydra to finish
- Gnar Kill Range: Level 6 + first item: kill at ~30–40% if Shen W/E down
- Critical Levels: 2 (taunt), 6 (global), 9 (Q max) for Shen; 3/6/9 for opponent
Level by Level Game Plan
| Level | Primary Goal | Lane Position | Trading Opportunities | Kill Windows | Setup Opportunities |
|---|---|---|---|---|---|
| 1 | Blade positioning and CS lead | Keep wave just outside tower range | Auto once after enemy last-hit then walk back | Low unless enemy blows cooldown | Aim for slow push to hit level 2 first; Ahead: zone at bush; Even: farm; Behind: hug wave and call for cover |
| 2 | Leverage E threat | Hold wave 6–8 minions near your side | E>Q autos only if enemy key spell down | Medium with IgniteIgniteDeals true damage over time to target enemy champion and reduces healing effects on them for the duration. + minion lead |
Crash 3rd wave and ward; Ahead: dive with jungler; Even: reset; Behind: drop wave and base |
| 3 | Enable W blocks | Freeze after bounce | Bait then cast W on blade and take 2 autos | Medium if E hits and wave small | Track jungler path |
| 4-5 | Pre-6 stability | Thin to avoid big waves | Short trades on CDs; avoid extended | Low unless jungle arrives | Base on cannon for TiamatTiamatMelee attacks hit nearby enemies/bootsBootsSlightly increases Move Speed |
| 6 | Global impact | Hover where you can R safely | Only fight with R advantage or jungler | High with E+IgniteIgniteDeals true damage over time to target enemy champion and reduces healing effects on them for the duration. if enemy wastes ult |
Sync wave, then look bot on spawn timer |
| 7-8 | Item completion | Perma push then move | Use Hydra reset for burst then kite out | Medium; look for taunt-flashFlashTeleports you a short distance toward your cursor. |
Herald control with prio |
| 9+ | Transition to side-lane | Side-lane opposite objective | Q max short trades | Medium-High with Hydra + vision | TP/R timers for objective fights |
| Mid Game (11-16) | Cross-map picks | Play long lane with vision | Catch overextends with E flashFlashTeleports you a short distance toward your cursor. |
High on isolated targets | Crash wave then move first to objective |
| Late Game (16+) | Front to back + picks | Flank from fog; peel carries | Engage, peel, or zone with W | Pick carries with taunt-flashFlashTeleports you a short distance toward your cursor. |
Control river chokes with wards |
First Back Goals
Ideal Back (1200–1500g)
- TiamatTiamatMelee attacks hit nearby enemies (1200g)
- Control Ward (75g)
Crash cannon wave; deny freeze and sync `R`
Standard Back (700–900g)
- Ruby Crystal (400g)
- BootsBootsSlightly increases Move Speed (300g)
Bounce wave then recall safely
Teamfight Tips
| Aspect | Shen | Gnar |
|---|---|---|
| Primary Role | Engage/peel hybrid with global pressure | Duelist/engage depending on kit |
| Target Priority | Enemy diver hitting backline Immobile carries Objective contesters |
Shen when W is down Allied carries Frontline low HP |
| Objective Control | Set up early at Herald/Drake with `R` ready Force numbers advantage via cross-map |
Start on spawn with shove Turn when Shen shows bot on `R` |
| Positioning | Flank from fog; hold E flashFlashTeleports you a short distance toward your cursor. for carry Zone with W in choke |
 MarkMarkThrow a snowball in a straight line at your enemies. If it hits an enemy, they become marked, granting True Sight, and your champion can quickly travel to the marked target as a follow up. Shen to stop `R` channel MarkMarkThrow a snowball in a straight line at your enemies. If it hits an enemy, they become marked, granting True Sight, and your champion can quickly travel to the marked target as a follow up. Shen to stop `R` channelFight in long lane away from Shen blade |
| Other Tips | Interrupt dashes with taunt mid-air Use W on hyper-carry during crit windows |
Bait Shen E near minions then re-engage Hold mobility for taunt- flashFlashTeleports you a short distance toward your cursor. |